Acid Solder Club’s ZENITH is a standalone diy synthesiser that eliminates the drag and hassle of breadboarding for beginners, who are eager and hyped to solder, design and code their first synth!

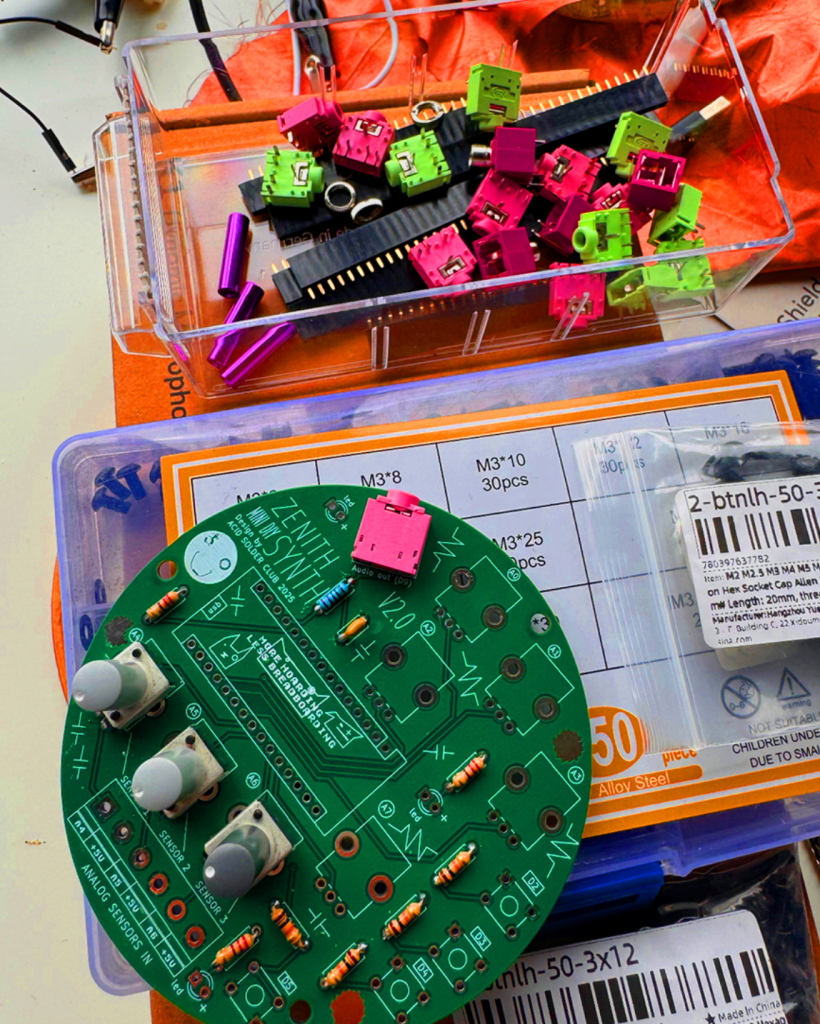
Zenith
This portable disk of sonic mayhem comes with an Arduino Nano brain and various components, that easy the way of programming Arduino projects for beginners. ZENITH can be programmed as a sound source, modulation source or controller for led’s and other hardware and comes with audio output jack onboard.
You can program a FM Bass Syntheseizer, Random Arpeggiator or noise source and much more! Zenith contains a set of 5 control potentiometers, and 3 analog input ports that are routed to be used as a voltage divider so you can tweak and adjust the amount of incoming analog sensor data (which is very handy for light sensors/LDR’s). There’s also 4 digital I/O points with switches, and 3 led’s in the basic kit.
The onboard Digital pin connectors can also be used to trigger relays, turn DC motors on and off, control pixel LED’s and it’s kind of skipping all the important electronic breadboarding experience you would be having learning electronics the traditional ways so you can learn and use code with Arduino Nano, without having to drag along a breadboard all the time.
On this page you find the Zenith:
- ZENITH Build and Soldering Guide
- How to get started with programming Zenith
- Example Codes
- FAQ and Community codes
Build Guide
How to build your Zenith? (V2.0)
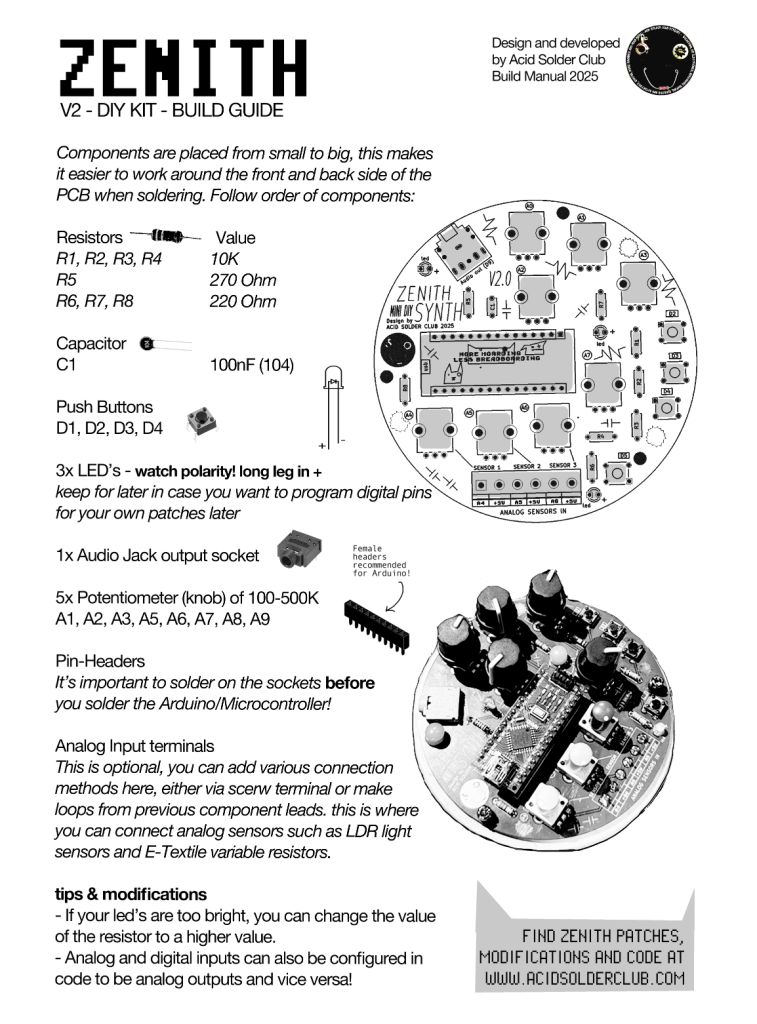
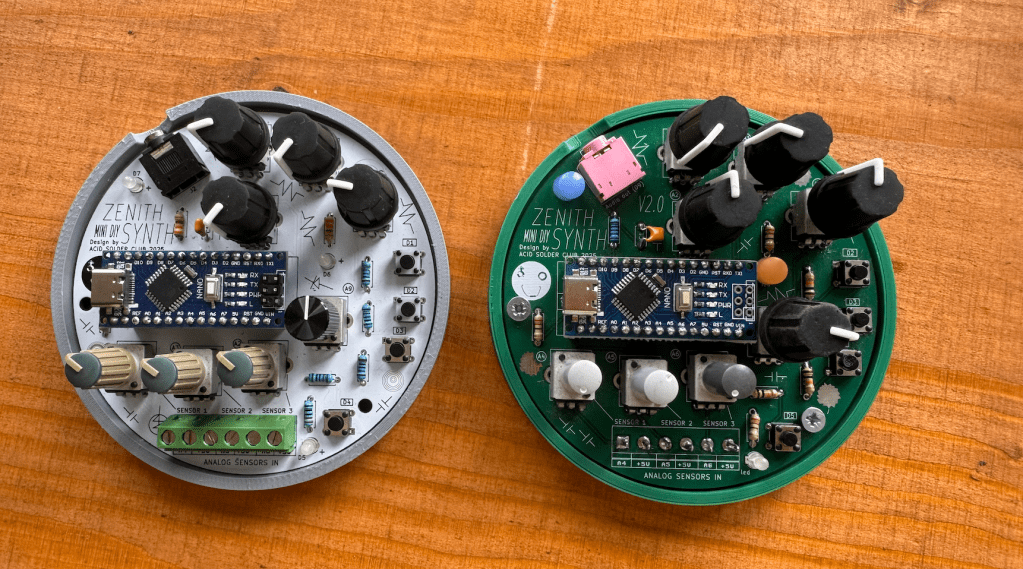
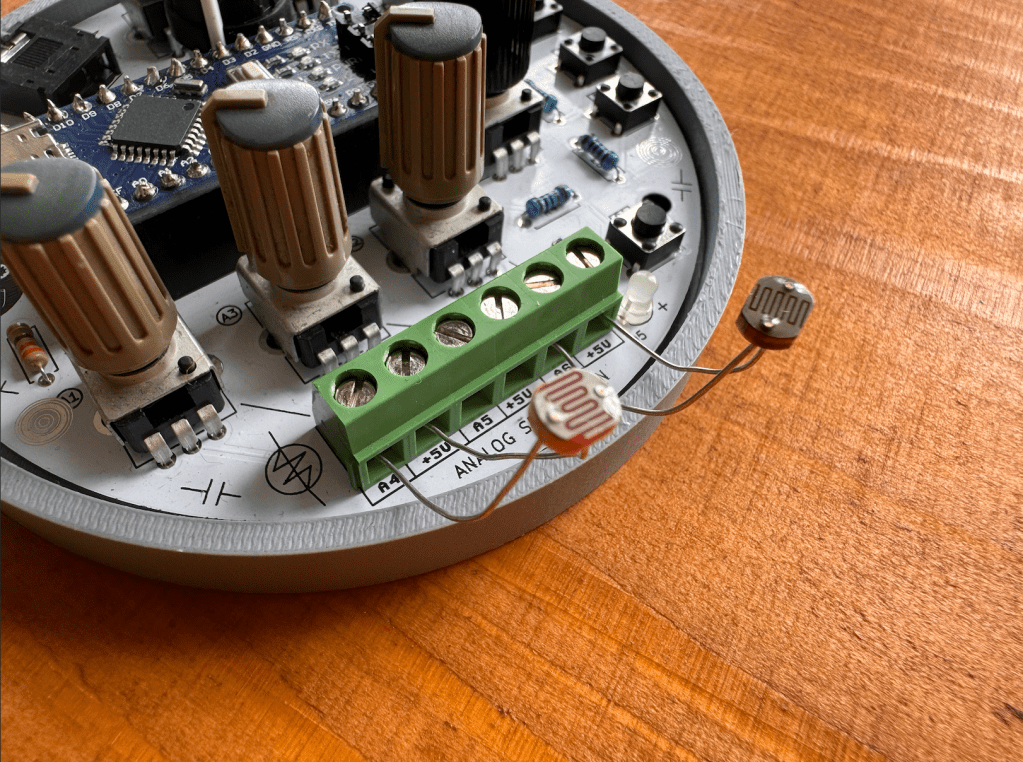
After soldering and following the build guide! Your kit should look like somewhat like this! Use the USB-C power connector of the Arduino Nano to power Zenith.
Connectivity Terminals
from the kit, because some people wanted to leave these points open to solder something on later. You can also bend some of your leftover clipped components leads to create pins for connecting alligator clips to! Here you see 2 different ways of connectivity:
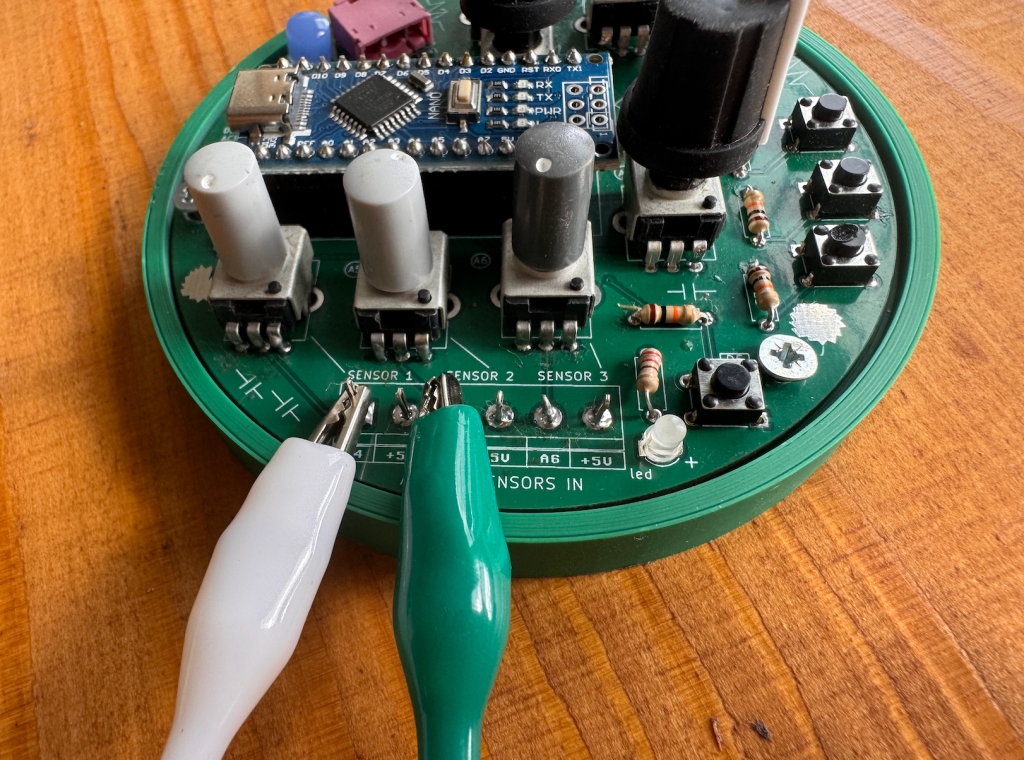
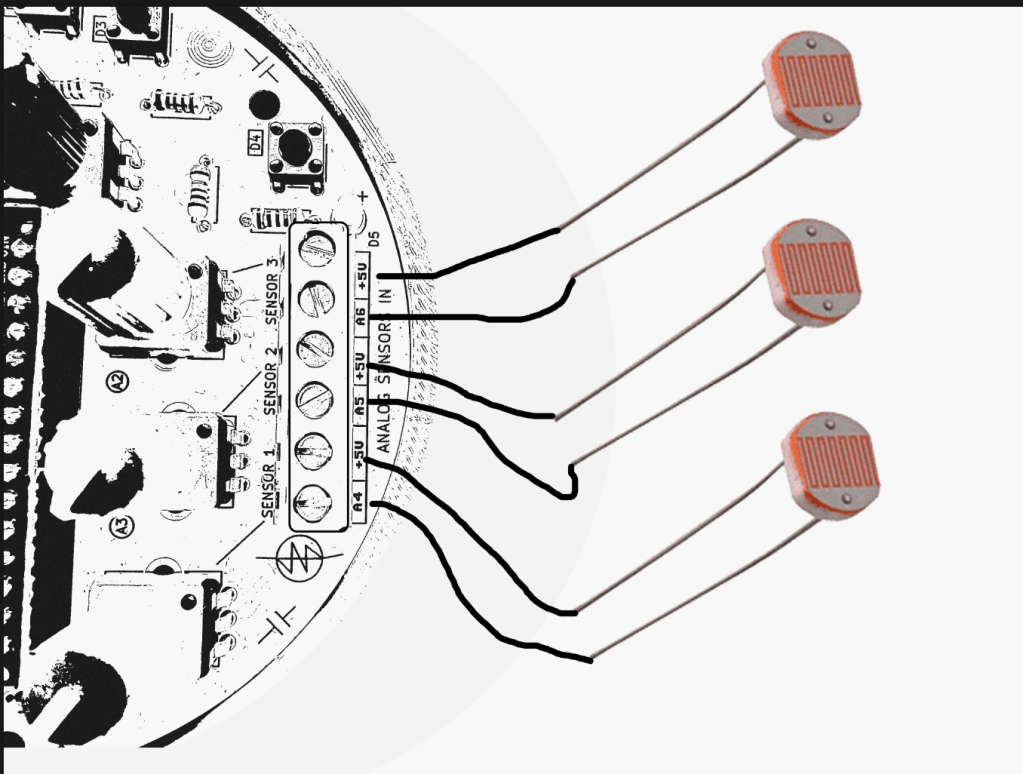
Analog Sensors
Zenith is designed to work well with external use of Analog Sensors, if you’re new to this concept of analog sensing, there’s some nice documentation about this on the Adafruit Analog Input page. The analog sensor input, can pick up changing voltages in sensors such as:
- LDR’s: Light Dependent resistors, Arduino tutorial here.
- E-Textiles: variable resistors, find a repository of different examples of E-textiles here at Kobakant.
- Combinations of conductive and non-conductive materials: such as copper, metals, conductive paint, conductive print filament, charcoal.
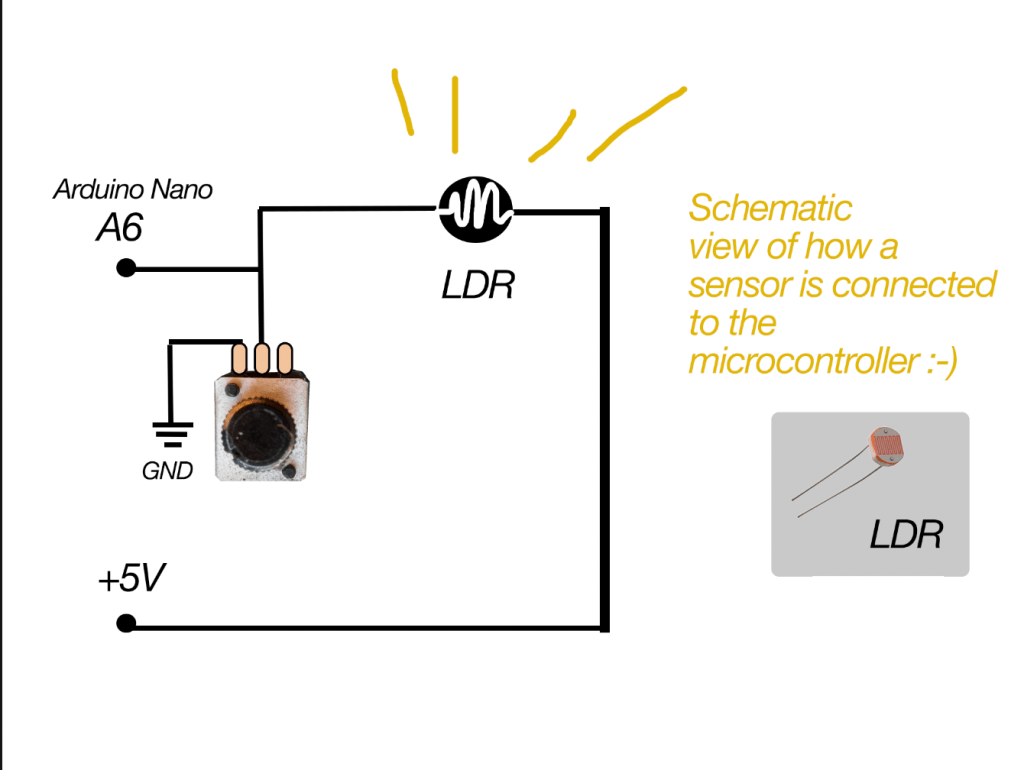
in the schematic representation of Zenith (below) you can see that each sensor input will go trough a potentiometer before connecting to the microcontroller. In this way, the potentiometer acts as a Voltage Divider. Simple explanation: it makes the sensor input variable and adjustable (more or less electricity flow) before it is read by the Arduino. Which is handy if you want to have more or less sensitivity on your sensor.
Always make sure your sensor is connected to the +5V on one side, and the Analog sensor pin on the other side:
Arduino Nano ADDITIONAL DRIVERS?
This is something that was noticed on a recent DIY kit day where people soldered a Zenith, not all Arduino Nano’s are the same! Some are connectible via USB-C, and they have a different chip on board which means you need to install some additional drivers at home if you want to code with your Arduino Nano.
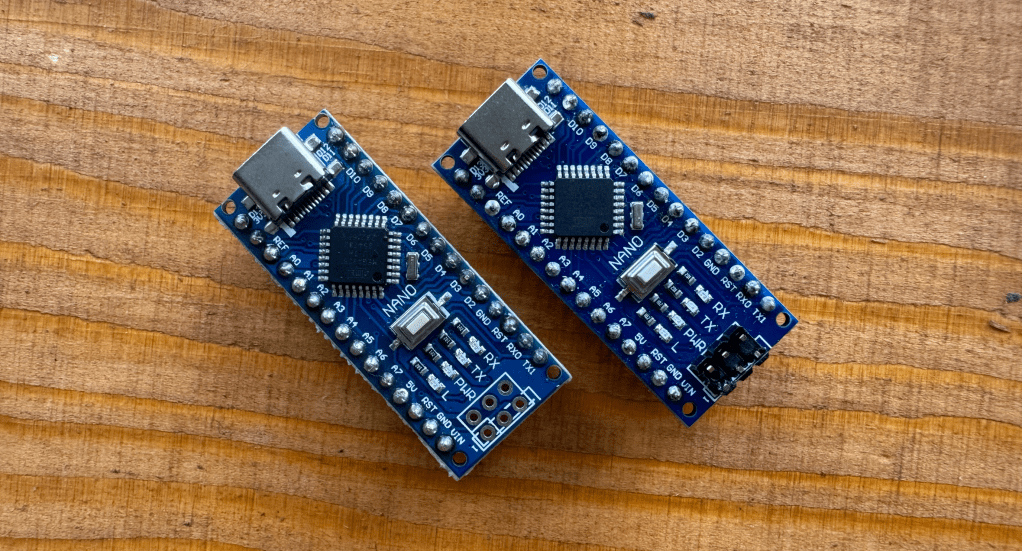
Some of the Arduino Nano’s are from Hobby Electronica -> here <- and are Arduino Nano’s with USB CH340 onboard, they are compatible with the Arduino IDE and programming environment just like a normal Nano after installing the driver.
These Arduino Boards have an integrated CH340 usb onboard, and this means you have to install some additional Drivers. A driver is an extra piece of software, that allows your computer to “see” the Arduino Nano over usb-c, and accept it as a valid USB microcontroller to program on. Theres detailed instructions on the Hobby Electronica website, you can also find the needed
DRIVERS via this link! (MAC – WINDOWS – LINUX)
Download the one you need and your PC has to restart afterwards. Now you should be able to upload on the board without any problems, otherwise send out a message!
In case you have Arduino Nano without the CH340 usb connection, this step is not needed! You will notice if you try to upload the codes if you need drivers, the Arduino IDE will give you an error that is something like: “usb driver not found” or Board not found.
Zenith Schematic
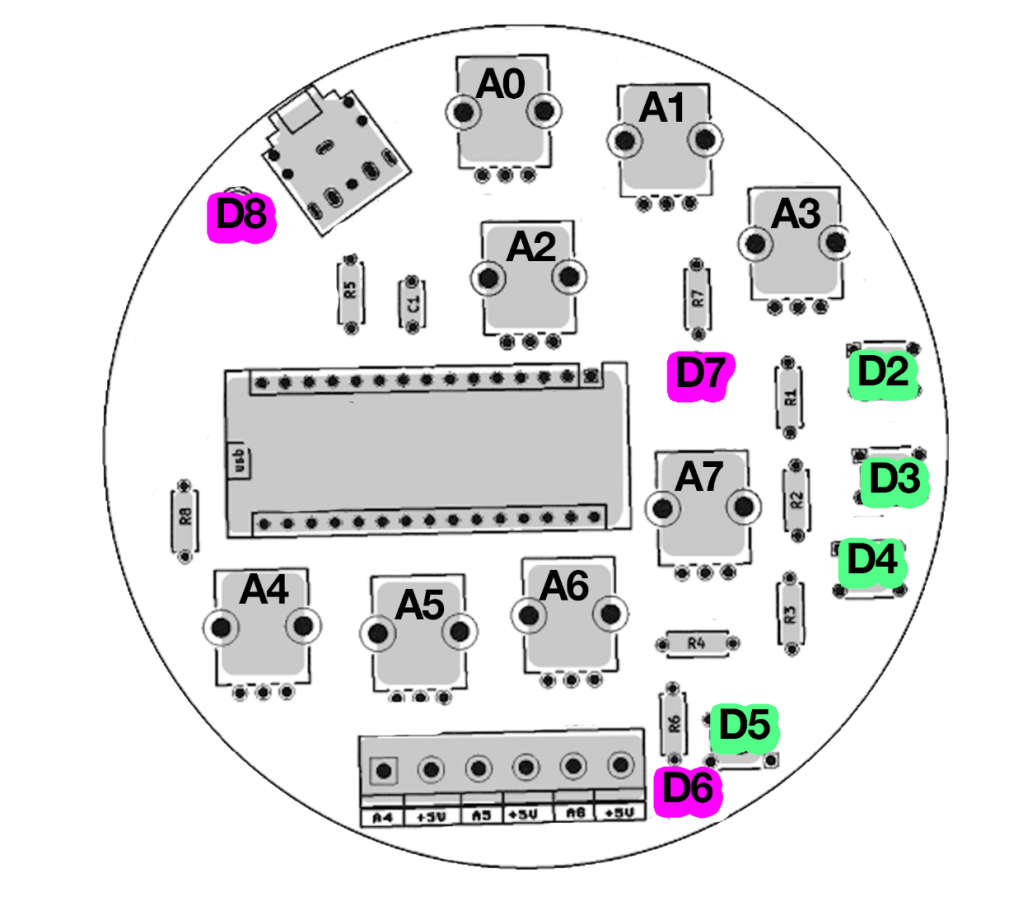
Arduino Nano pin correct in-outputs:
| A0, A1, A2, A3, A4, A5, A6, A7 | Potentiometers |
| D2, D3, D4, D5 | Digital Pins I/O (buttons) |
| D6, D7, D8 | LED’s |
Coding Zenith
There’s multiple roads to learning how to program with an Arduino, some like to first change numbers around in example codes, others like to follow step by step tutorials breaking down each part of code and hardware after another.
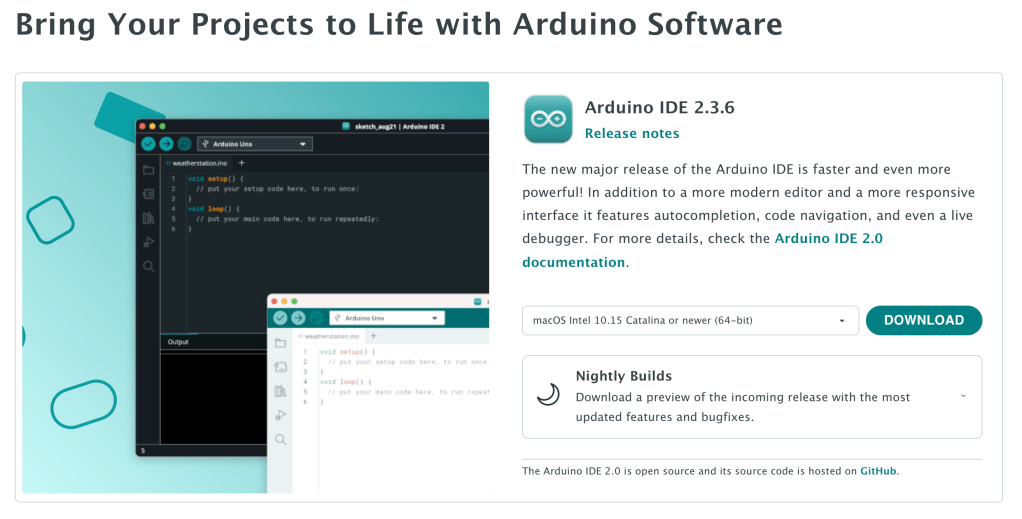
For programming the board one way or the other, you always need some sort of progreamming environment and the most common for Arduino is the ARDUINO IDE. You can also code via the webbrowser and other software but thats for another time.
You can start from scratch and map different parameters of Zenith (potmeters, sensors, switches) to led’s and sound outputs. One of the libraries I’ve used for sound programming is the Mozzi Library. There’s a step by step instruction there and the sound output of ZENITH is PIN 9 for if you want to try out example codes there!
Acid Solder Club Code’s for Zenith
Here you find 3 example codes for Zenith
FM Bass with WOBBLE CONTROLS (dubstep Synth)
Code 1: Simple version
Code 2: With distortion and volume control
Layout for what is doing what exactly of the code coming soon! so far controls are:
use A0, A1, A2 for controlling the Basssline FM parameters such as carrier wave and modulating wave.
A3 Controls DISTORTION (yay)
A7 control output volume
pushbutton D2 = tap tempo! tap this in different speeds to change the overall tempo.
D3 = short burst of speed change
D4 = pitch octave up!
potentiometers on the bottom A4,A5,A6 are controlling speeds as well and can be modulated by light sensors or be even fancier with this and smack some vactrols on there to be controller by external LFO’s!
LO-FI Breaks – Amen breaks mangler
Code 1: Simple version (v1.0 of Lo-fi breaks)
Code 2: Pulsating Led’s! More Chaos! even less playability of understanding what is doing what! this is for the noise ones! oh where this ends I dunno… can you wreck it more?
controls are mostly on A0, A1, A2, A3 and A7 for mangling the Amen Break sample such as sample speed, modulating speed, more more more things to glitch and stretch the sample apart till not a lot is left 🙂
BArtpeggio
Code for Zenith made by hardware hacker and super coder Bart Jakobs: a generative Arpeggio for Zenith! Thank to Bart for this amazing patch. Tweak around the main knobs to get interesting involving patterns, trow it through some effects pedals and let this patch tickle your ear buds!
use A0, A1, A2, A3 for controlling the arp parameters.
A7 is controlling the ARP speed
pushbuttons change arp variations and scale!
click noises included ❤
FAQ
Can I add more things to Zenith?
yes, all other unused inputs are possible to use if you have a method to work around the interface. Let your inner hardware hacker go wild
Is Zenith open source?
So far the schematic and code are open source, the kit/pcb is planned to be open source but not yet as for 2025.
Can I follow a class at Acid Solder Club for programming?
YES! this is planned for upcoming months after summer, you can bring your soldered ZENITH or build one on site and there will be multiple basic coding classes for both schools and from the workspace in Utrecht!
