Tag: diy

  • PCB DESIGN COURSE IN KICAD ( FULL!)

    Learn step-by-step how to design a basic project PCB from start to finish, with this beginner KICAD workshop and kickstart your PCB manufacturing skills!

    Ever wanted to turn your breadboard experiments into something a bit more solid? In this workshop we explore and follow a step-by-step proces of how to design your own circuit board using KiCad from schematic to PCB layout and ready to order!

    Why design your own PCB?

    Because it’s satisfying to make something that lasts longer than a breadboard project. 🙂 A PCB keeps your circuits stable, easy to share, and ready to reproduce in case you want to make copies for yourself, friends or to sell them. Whether you order it from a fabrication manufacturer such as JLCPCP or PCBWAY, or try etching it yourself, you’ll understand what’s really happening under the surface and that PCB making is not that difficult at all!

    What you’ll learn:

    • KICAD software basics, library management, understanding the user interface
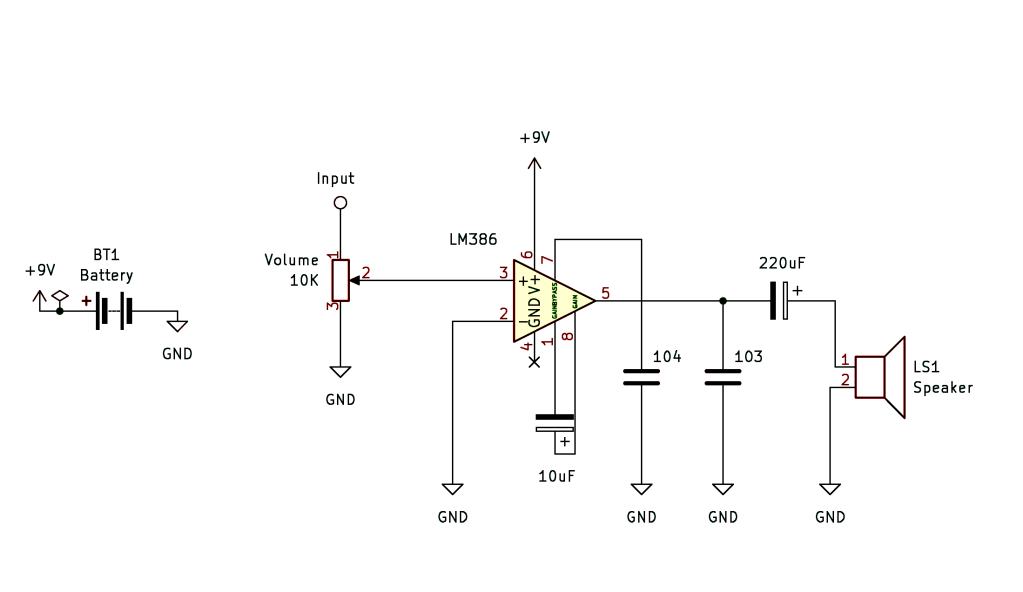
    • Building a simple schematic with a 555 timer circuit or oscillator drone circuit
    • Linking symbols in the schematic design, to pcb footprints
    • Routing traces and designing your layout in the PCB editor
    • How to make your own footprint and symbol from scratch
    • Basic design strategy and workflow of KICAD
    • Common beginner mistakes + insider tips & tricks
    • Interface and usability of our design
    • Intro in the PCB manufacturing process, post-design process
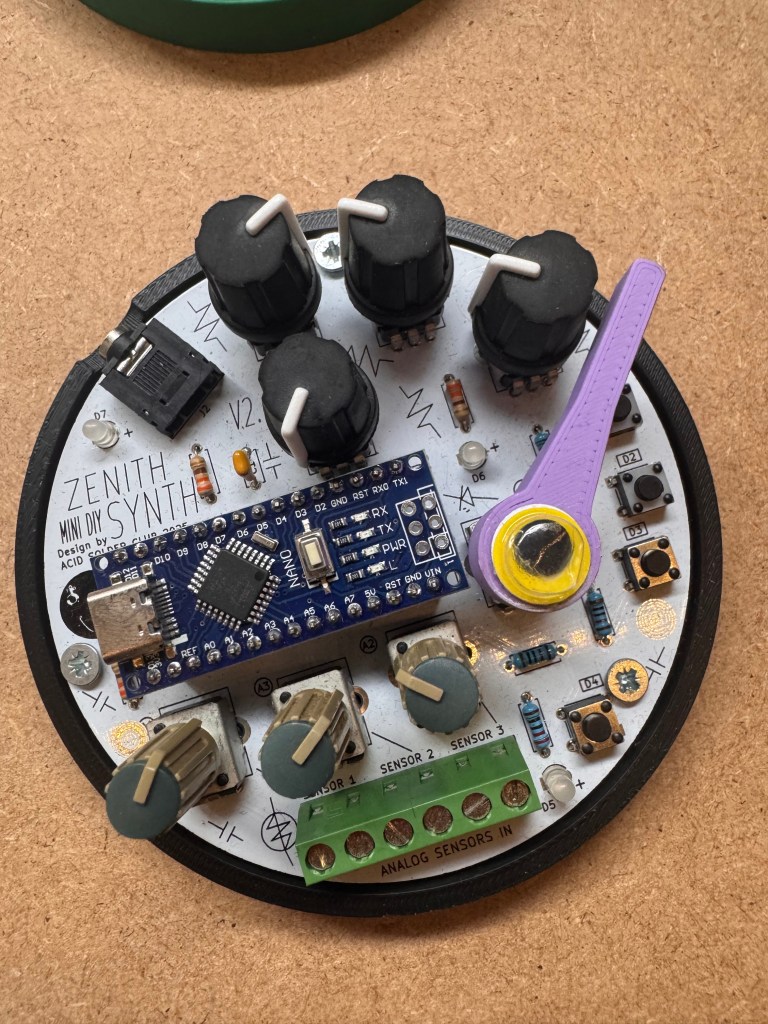
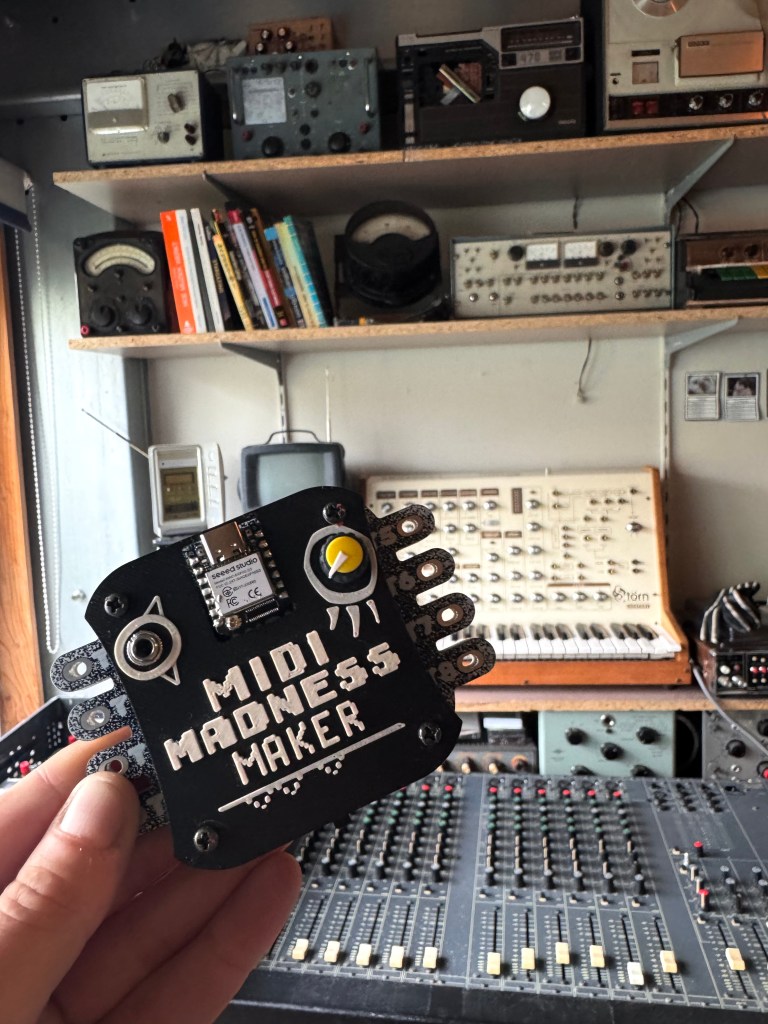
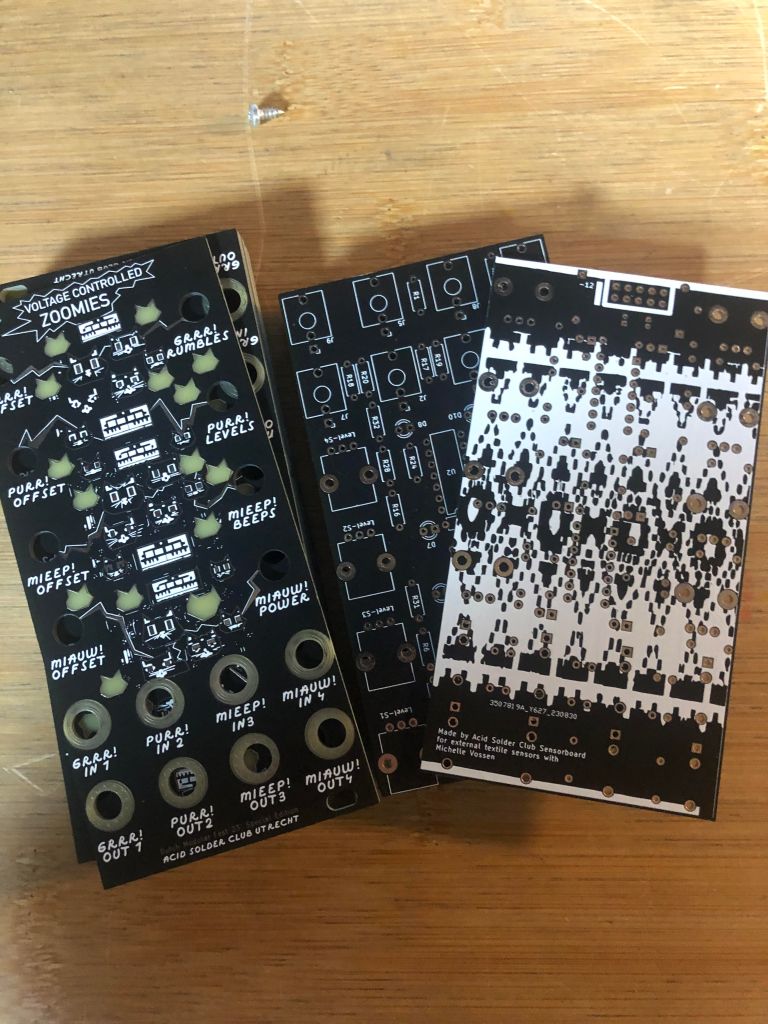
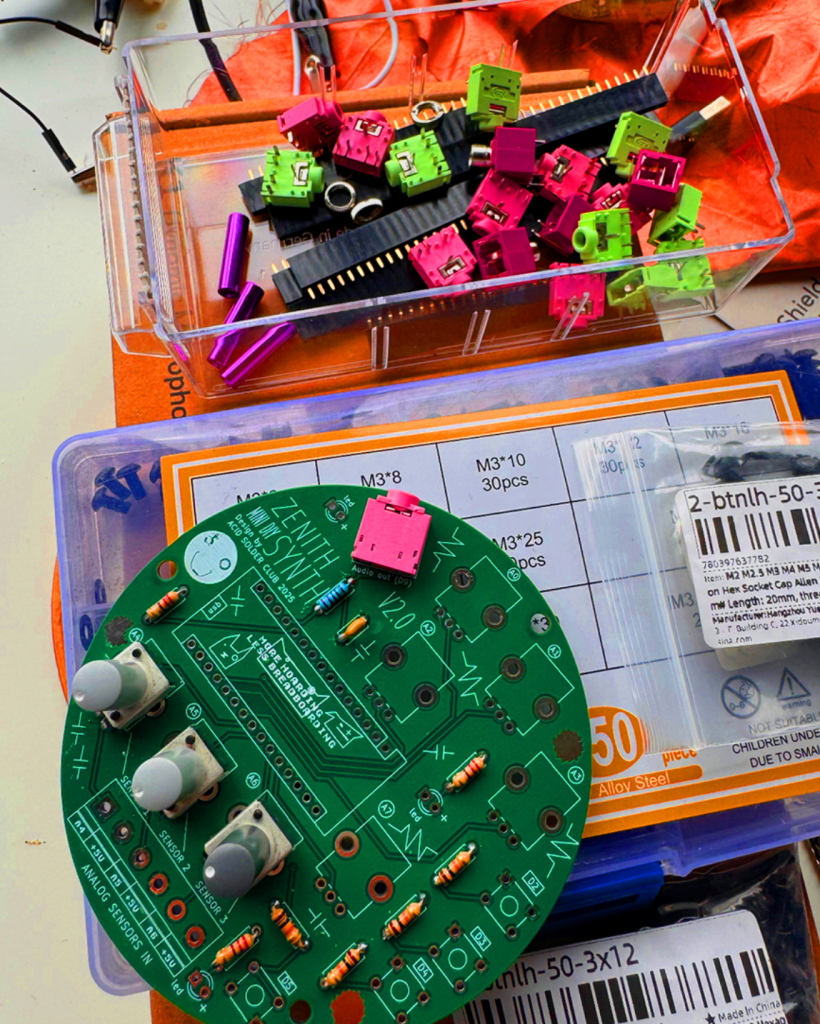
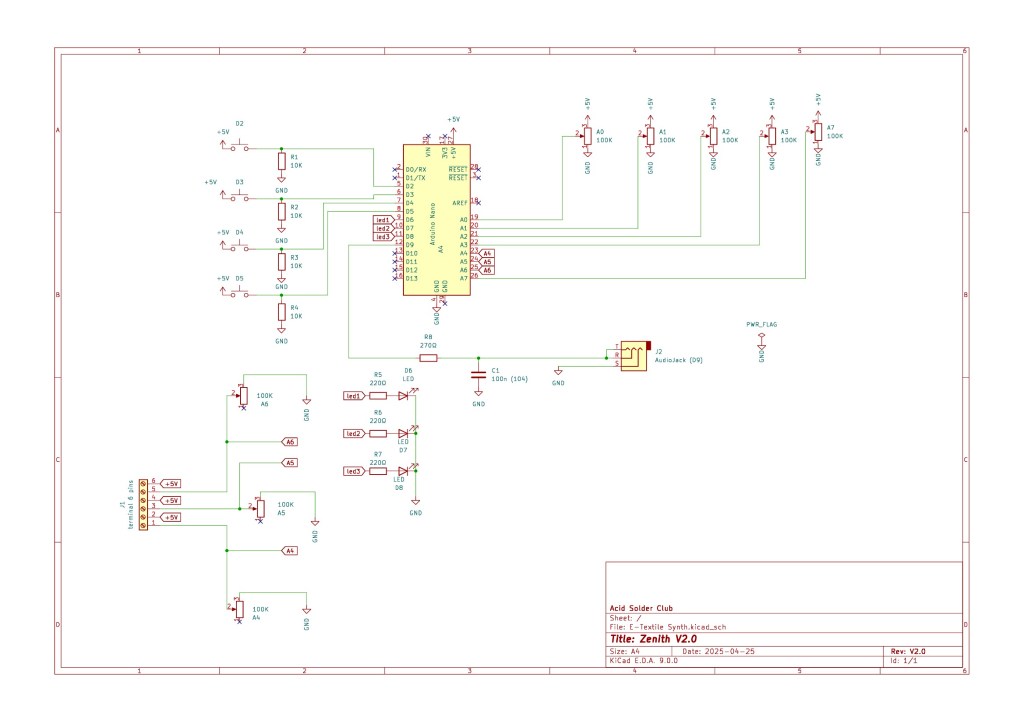
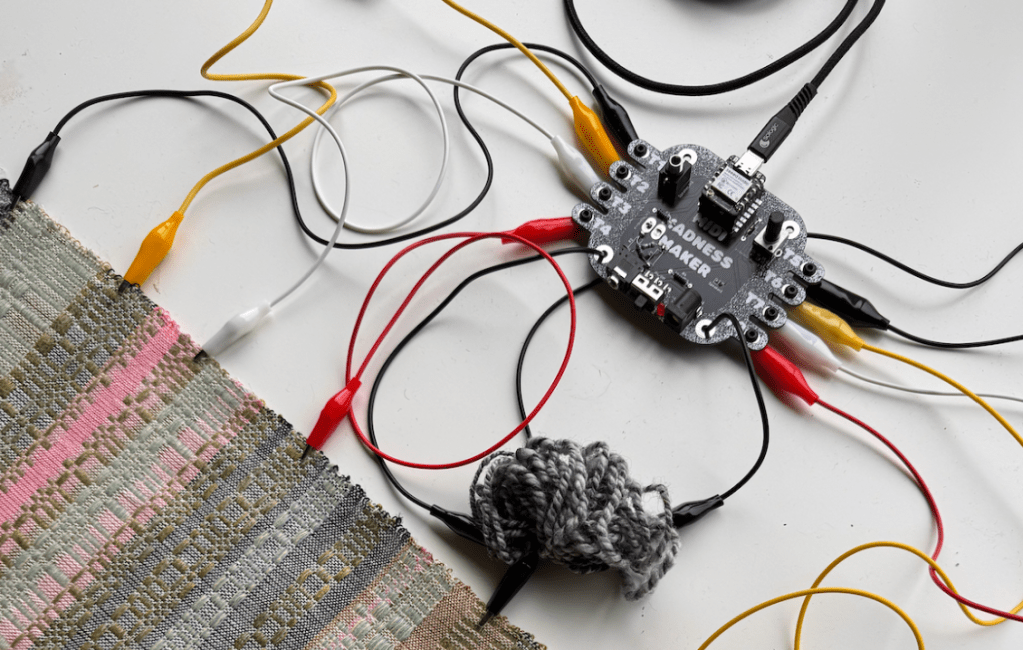
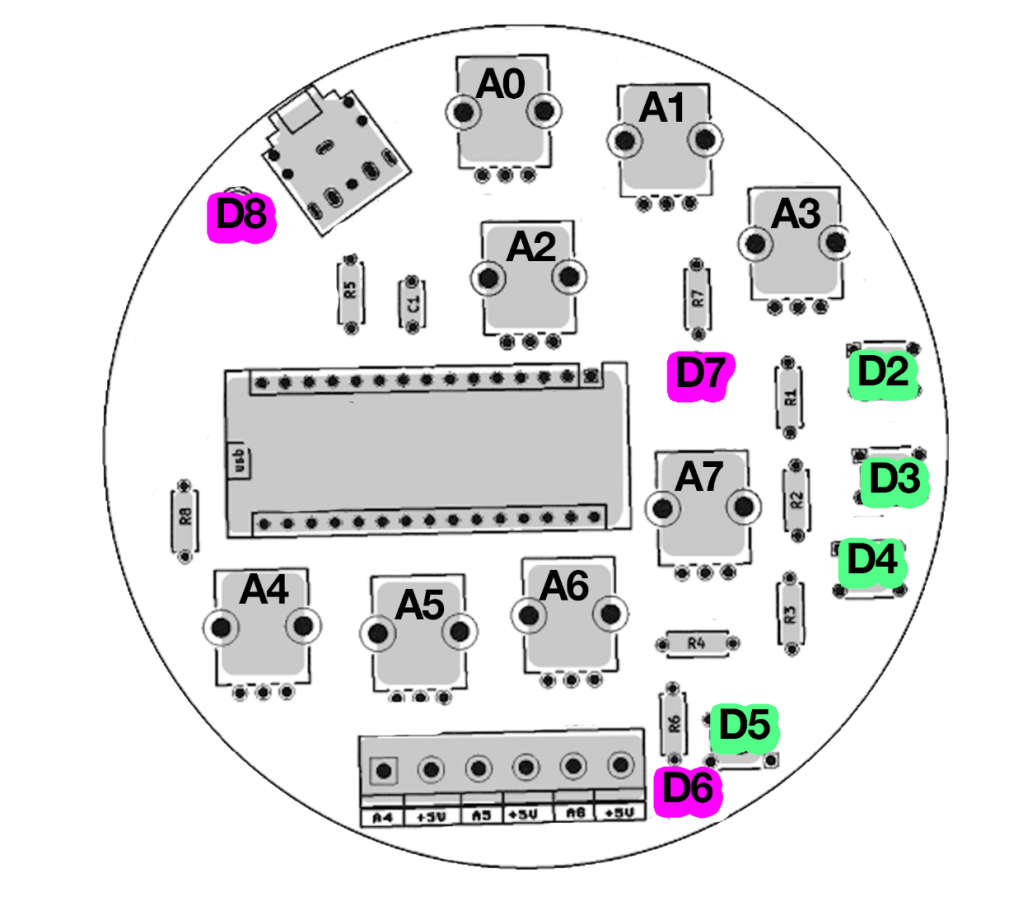
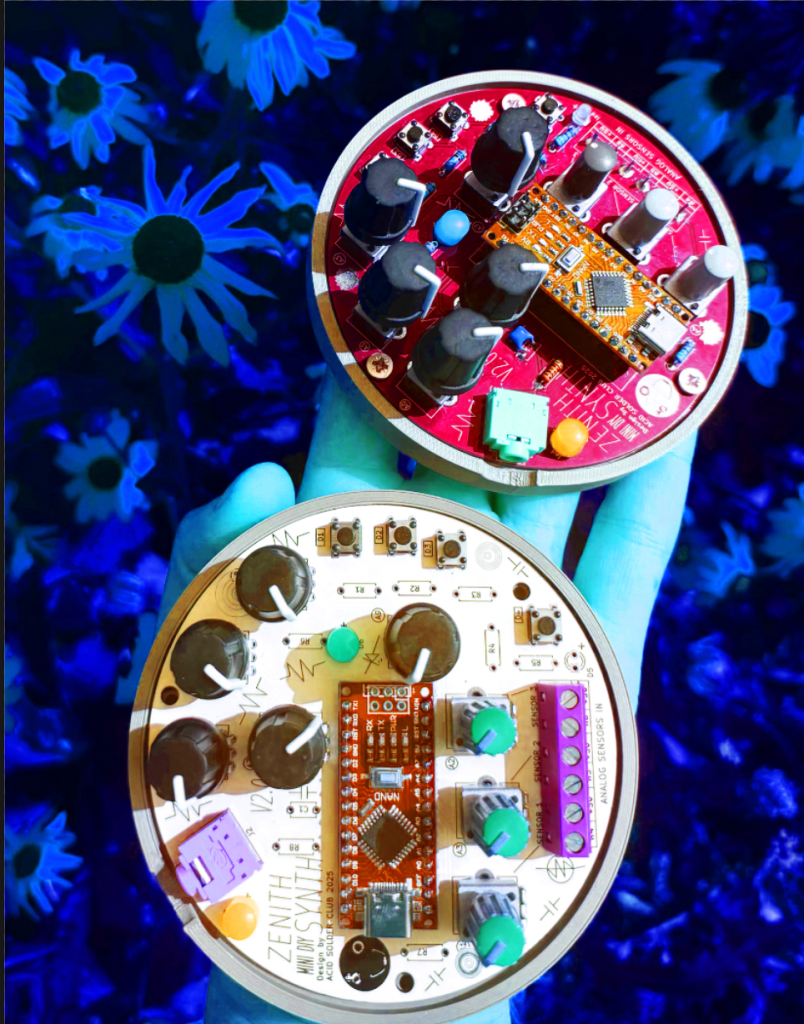
    • Lot’s of user examples and designed PCB’S from Acid Solder Club to examine

    The workshop is suited for those who already have some prior knowledge in basics of electronics and components. This is not a beginner electronics workshop, but if you can read and understand basic schematic knowledge and circuit design it should be ok. When in doubt, contact Veerle on http://www.acidsolderclub.com for checking if this is something for you.

    Practical info

    These are 2 separate workshops, both workshops will be held in ENGLISH, but if your English is not so good, we can translate a bit in between course blocks when needed.

    • Coffee, Tea and Cookies included, bring your own Lunch!
    • All day long hands-on workshop with time for Q&A at the end.
    • For this workshop you need a PC with MacOS or Windows, and install the latest version of KICAD V9.0. via https://www.kicad.org/download/. preferable beforehand, otherwise make sure to be in time or arrive 10 mins earlier to install KICAD if your unsure of installing.
    • Location is Hof van Cartesius, Vlampijpstraat 94, Utrecht. It’s a short walking distance from Station Zuilen or OV biking/bus distance from Utrecht Central Station. Parking is free between 11:00-06:00 in Vlampijpstraat.

    REGULAR PRICE €65,-

    STUDENT PRICE €50,-

    Workshop limited in space (8 people) for small class courses.

  • MIDI MADNESS MAKER

    MIDI MADNESS MAKER

    The MIDI MADNESS MAKER, is a standalone DIY syntheseizer and MIDI controller interface you can make yourself with a focus on capacitive touch data. With Midi Madness Maker you can create your own tactile controller translating touch to MIDI control and CC messages over TRS-Midi jack- 5 pin DIN or Wireless over Bluetooth.

    We have made a giant online repository of example codes available for those who want to try things out with the MIDI Madness Maker. In February 2025 we launched the first hackathon where various artist, makers and designers in the field of creative technology, music and interaction build their own kits and interfaces. We are planning more Hackathons and one day workshops in 2025 and 2026, and are working on the V2.0 version that will be in production around august 2025.

    E-Textile Keyboard crafted by Michelle Vossen

    BUILD DOCS AND MANUALS

    Here you find your page for all the info we’re collecting from Midi Madness workshops and hackathons. Build guides, patch guides and code updates:

    MIDI MADNESS PROJECT DOCUMENTS

    Most recent code for Midi Madness Maker V3

    CONTROLLER OVERVIEW

    What is the midi madness maker made of? The brain runs of a XIAO ESP32 microcontroller and consists of mostly that and a few more other components and utilities, to help out with MIDI-TRS translation and power regulation for external power sources. The Kit is a fairly easy build that can be finished and tested in 1-2 hours (on beginner lvl).

    The kit contains a few optional parts, such as the build-on speaker depending if you want that option or output the sound over the Audio Output Jack. Another optional part is the Bluetooth antenna, so far we have had no connectivity issues without it, but for more stable data transfer and farther reach, the antenna is recommended to click on the microcontroller (included in kit)

    MIDI MADNESS MAKER EXAMPLES

    Modular Synthesiser Touch Controller

    Make your own DIY TOUCH controller for modular synthesisers and hardware synths over MIDI trs -DIN connection. For this option you will need some sort of midi to Gate/CV translation module, such as the Befaco Midi Thing V2 (DIY KIT), Majella MCVC or the DIY Project “MIDI MUSO” MIDI to CV soldering kit https://midimuso.co.uk.

    Code is fairly simple: you can find the layout of the touch pads of the ESP32 in the Midi Madness Maker repository, or figure them out by searching for the pinout of the microcontroller. Connect your own conductive touch interface to the midi madness maker, and in the code you make use of the Arduino MIDI Library where every time touch happens, it will send a MIDI Trigger or CC blip out over the TRS-mini jack to 5-Pin Din converter. IMPORTANT! There is 2 types of midi in this world, TYPE A ( Korg, MakeNoise) and other TYPE B (Arturia, Polyend) You can find the MIDI type A or B guide here: https://minimidi.world/?

    Other Hardware Synthesisers and Drummachines

    The sample principle as above (connection wise) is used for controlling hardware synths such as the Roland TR-505, KORG Volca Series, or a pretty Access Virus of your liking. In this case, you will not need a Eurorack Module to translate the MIDI 5 PIN DIN cable to triggers and gates or CV, since this conversion is happening in the hardware devices.

    Midi Madness Maker controlling KORG Volca FM

    SOFTWARE MIDI CONTROLLER

    With the MMM you can also control MIDI related Software connecting and connect your touch board to various DAW’s such as Ableton, Garageband, FLStudio, VCV rack and iPad/tablet apps, that can receive MIDI data.

    This can both be used:

    • by MIDI over USB (usb port of the ESP32)
    • by MIDI wireless over Bluetooth (Midi Madness Maker is then recognised as a Bluetooth device by your PC or Phone)

    This means the MIDI MADNESS MAKER can be used to:

    • Control Audio Software (Ableton, VCVRack, Mirack, Reaper etc.)
    • Control Video Software (TouchDesigner, Isadora, Madmapper, Resolume etc.)
    • Control Light Software (Resolume, QLC+, other DMX software)
    • other devices that have midi control options and can see Bluetooth or USB MIDI Devices.

    midi madness maker to VCV rack during MMM Hackathon February 2025

    MORE INFO

    ah so much information to share about this we will put examples out soon on Acid Solder Club YOUTUBE page and other platforms about user cases and all kinds of cool things to do with the Midi Madness Maker!

    Get in touch with us also if you are interested in hosting us for a workshop touch to sound, hackathon or any other event!

    Kit design and concept is by Veerle Pennock and Michelle Vossen.